A Kit for Every Kind of Wound
A box of Band-Aids is fine for a scraped knee. It's useless for a deep cut that won't stop gaping open, and it does nothing for a broken arm.
That's the problem Chapter 8 of Survival MD, "Buying Medical Response Kits" (pages 96–102), solves. Instead of one general first aid box, Dr. Radu Scurtu shows you how to buy and assemble specific response packs for specific injuries, each ready to grab, sealed and clean, the moment you need it.
As the chapter puts it: "There are times when you're in the field and need specific items for a specific ailment." And when you can't reach a doctor at all, having exactly the right pack can make all the difference.
The Three Response Packs
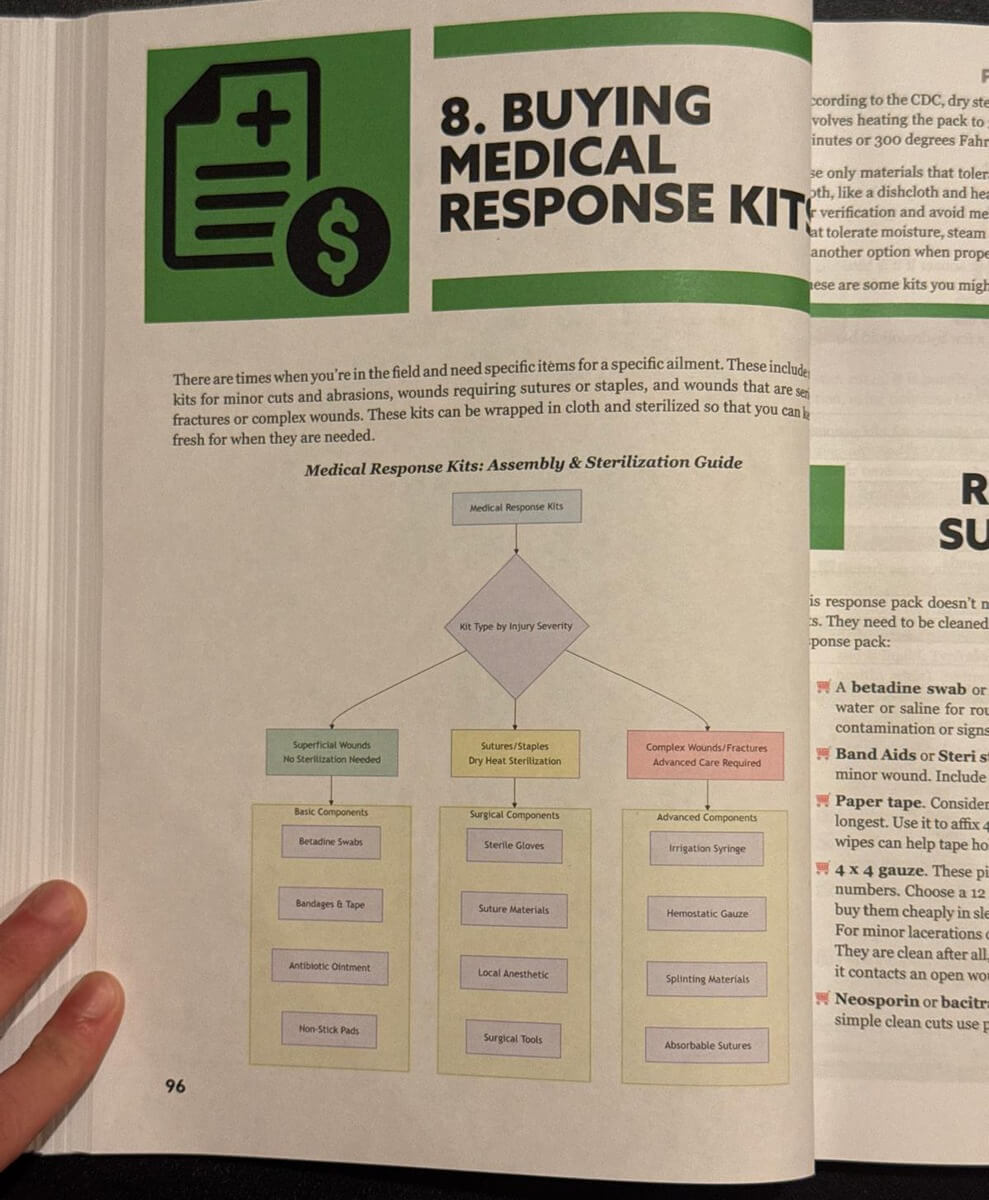
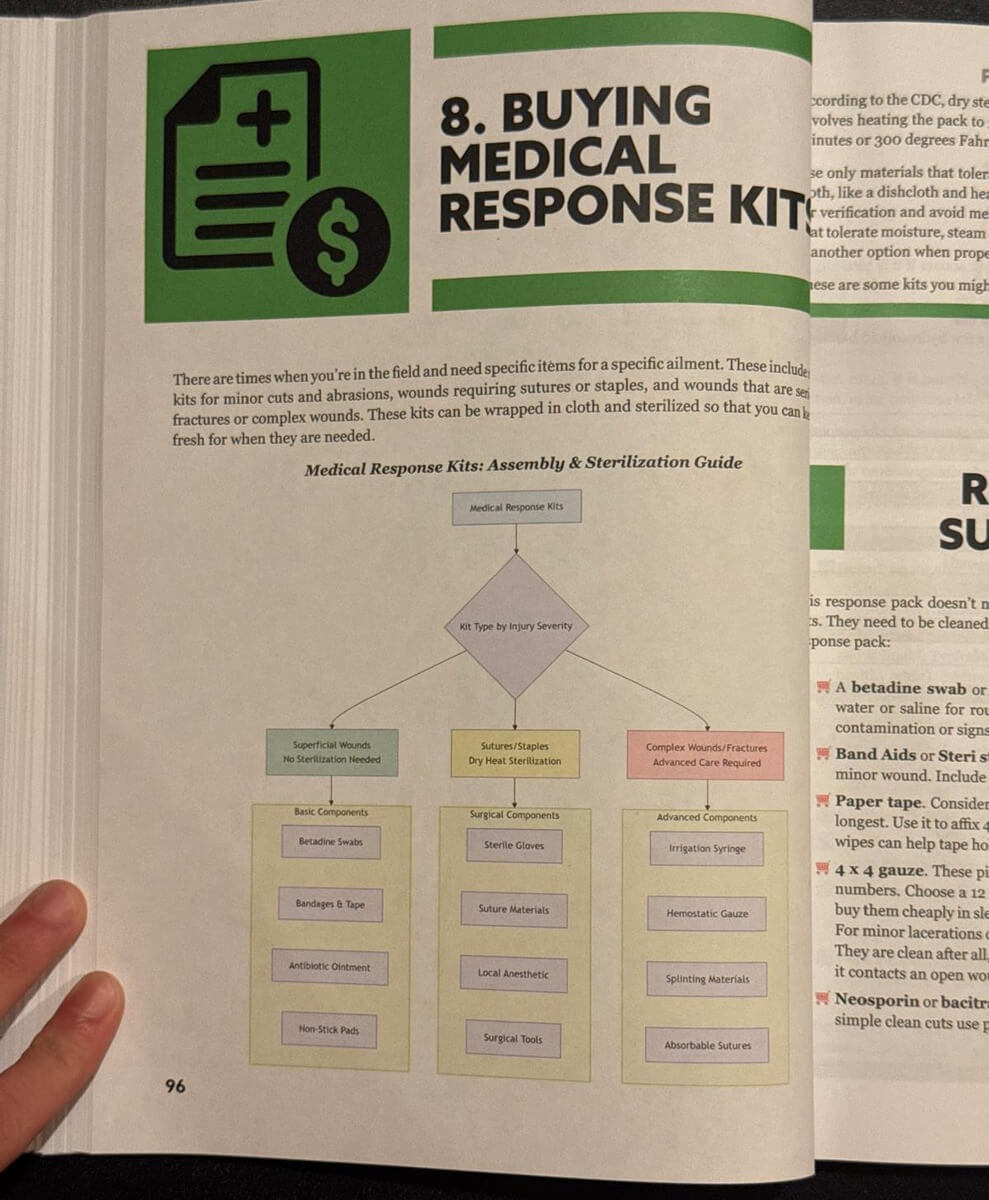
The chapter is built around a simple idea: match the kit to the severity of the injury. A visual guide at the start of the chapter sorts everything into three levels:
| Response pack | What it's for | How it's prepared |
|---|---|---|
| 🟢 Superficial wounds | Scrapes, abrasions and minor cuts | No sterilization needed |
| 🟡 Sutures or staples | Cuts that need closing, involving mainly the skin | Sterilized and sealed in advance |
| 🔴 Complex wounds and fractures | Deep or dirty wounds, possible broken bones | Advanced care supplies |
Each pack gets its own explanation, a printable checklist with quantities, and notes on what each item is for.
How to Keep a Kit Sterile on a Shelf
Here's something most first aid guides never explain: how to sterilize your own kit at home and keep it ready for months.
Chapter 8 walks you through a dry-heat method, based on CDC guidance, that uses a cloth wrap and an ordinary home oven, with the exact temperatures and times for each option. It also covers which materials can and can't handle the heat, why you should check your oven with a thermometer, a steam option for items that tolerate moisture, and how often the packs need re-sterilizing.
Once it's done, the pack goes on a shelf, sealed, until the day you need it.
Pack 1: Superficial Wounds
The simplest pack, and the one you'll use most often. It covers everyday cuts and scrapes, the kind of injuries that are minor today but can turn into infections when clean water and doctors are scarce.
A few practical tips from this section we'll share:
- Paper tape sticks best to skin and lasts longest of all the tape types.
- Add a few non-adherent pads for scrapes that would stick to regular gauze.
- Plain petroleum jelly works for keeping simple, clean cuts moist if someone is allergic to antibiotic ointment.
The chapter also explains how to use the pack step by step, when to change the dressing, and the warning signs of infection to watch for. The full checklist has ten items with quantities, plus a list of optional add-ons.
Pack 2: Wounds That Need Closing
This is the pack that separates Survival MD from basic first aid books. It covers the supplies for closing a laceration that involves mainly the skin, not deeper structures like muscle or tendons.
The chapter includes:
- A full Suture/Staple Response Kit Checklist with quantities
- A Suture Selection Guide showing which suture size and type fits which part of the body, from the face to the scalp
- Notes on gloves, antiseptics, local anesthetic, instruments and dressings
- A list of optional add-ons, including a reminder card for when stitches come out
The book is responsible about this: closing a wound is a skill that takes training, some steps are marked "when trained," and the goal is always to get definitive care when it's possible. The pack is about having the right supplies ready for someone who knows how to use them, or for a clinician who arrives without their own.
Pack 3: Complex Wounds and Fractures
The most serious pack is for deep lacerations, dirty wounds and possible broken bones.
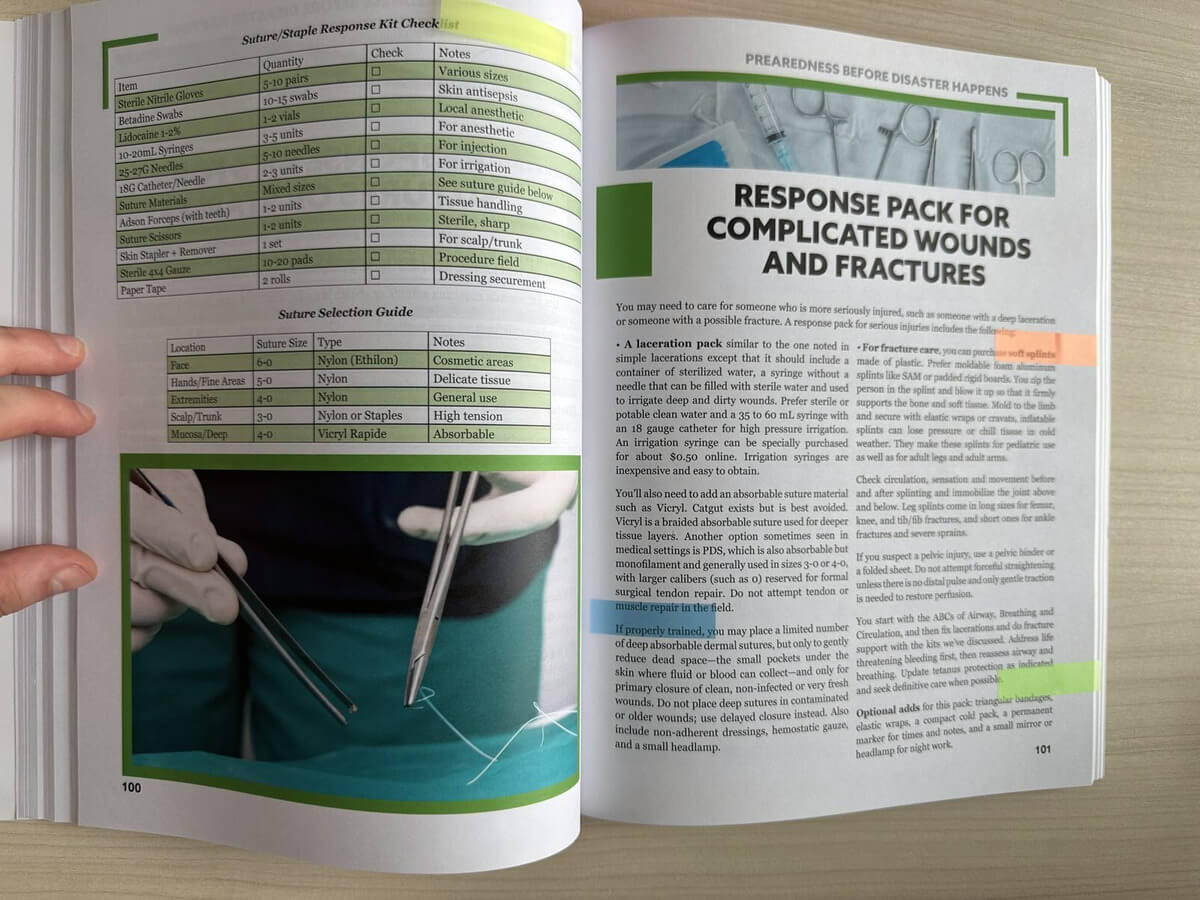
This section covers:
- High-pressure wound irrigation, and the inexpensive tool that makes it possible (the book notes one can be bought online for about 50 cents)
- Bleeding control supplies
- Splinting, including which types of splints to buy, how to secure them and what to check before and after
- What to do if you suspect a pelvic injury
- The order of priorities: what to deal with first, and what can wait
It also includes two important safety rules we'll share, because they prevent real harm:
- Don't attempt tendon or muscle repair in the field.
- Don't close contaminated or older wounds. The book explains the safer alternative.
The Wound Care Hierarchy and Splinting Guide
Chapter 8 ends with two quick-reference tools that are worth the price of admission on their own:
- The Wound Care Hierarchy: a simple chart that tells you, at a glance, what to do with a wound depending on how clean or contaminated it is.
- The Fracture Splinting Guide: a table covering ten injuries, from fingers to the femur, showing which splint to use and which joints to immobilize.
One example from the splinting guide: for a broken finger, buddy taping to the finger next to it is often enough, but not for the thumb, which needs its own type of splint. The rest of the guide is in the book.
Why Chapter 8 Matters
- It matches the kit to the injury. No more digging through one big box during an emergency.
- It tells you exactly what to buy. Three printable checklists, with quantities.
- It keeps supplies ready. A home sterilization method so packs stay clean for months.
- It's honest about limits. Clear lines on what not to attempt outside a hospital.
- It's built for when help is far away. Every pack is designed to keep someone safe until real care is available.
What Comes After Chapter 8
Next, Survival MD covers alternative and herbal medicine, preparing for first aid and emergency sanitation, before the second half of the book turns to what to do when an emergency actually happens, including full chapters on bleeding, wounds, burns and fractures, where these packs are put to use.
Frequently Asked Questions
What is Chapter 8 of Survival MD about?
Chapter 8, "Buying Medical Response Kits" (pp. 96–102), explains how to buy and assemble three response packs, for superficial wounds, wounds that need sutures or staples, and complex wounds and fractures, plus how to sterilize them at home.
Does Survival MD explain how to sterilize a medical kit at home?
Yes. It describes a dry-heat method based on CDC guidance, with temperatures and times, plus a steam option for items that tolerate moisture.
Does Chapter 8 include checklists?
Yes. Each response pack has a printable checklist with quantities and notes, plus a Suture Selection Guide and a Fracture Splinting Guide.
Does Survival MD teach you to stitch wounds?
Chapter 8 covers the supplies for a suture or staple kit and is clear that closing wounds takes training. It also explains which wounds should not be closed in the field.
Can you buddy tape a broken thumb?
No. According to Survival MD's Fracture Splinting Guide, buddy taping works for fingers but not for the thumb, which needs its own splint.
The Bottom Line
Chapter 8 turns first aid supplies into a real response system: three packs, matched to three levels of injury, sealed and ready on the shelf. It's one of the most hands-on chapters in Survival MD, and the one that makes the injury chapters later in the book truly usable.
You've had a preview. The full checklists, sterilization method, suture guide and splinting guide are in the book.